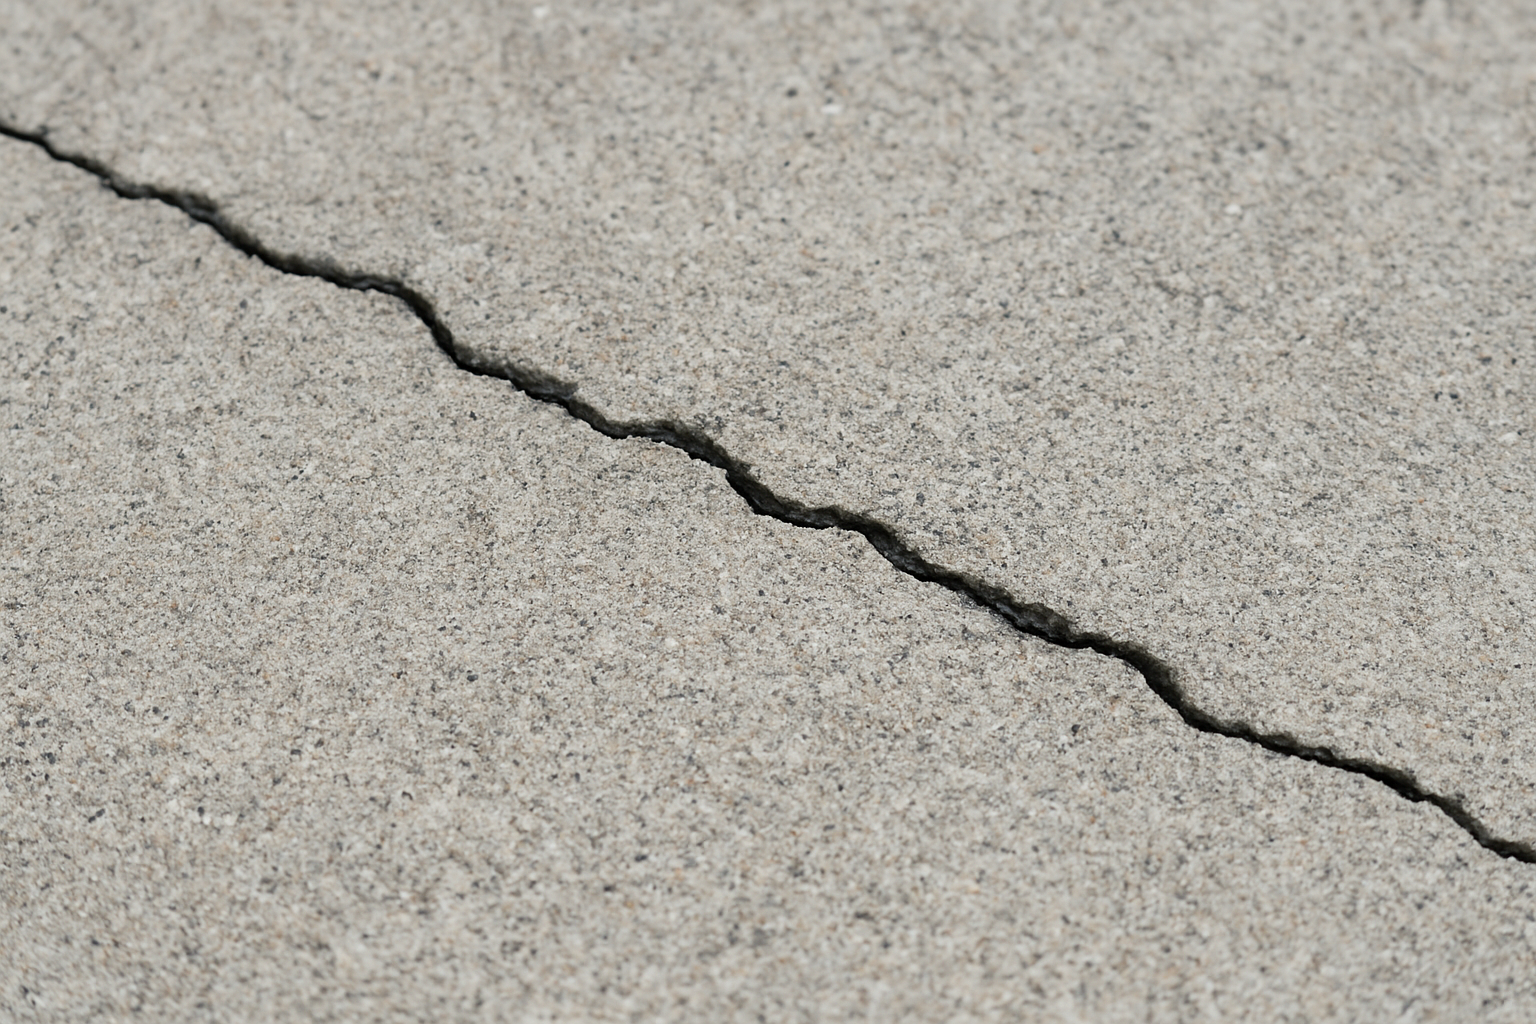
When I look at cracked concrete1 in driveways or foundations, I worry about water damage and further deterioration. These unsightly gaps can lead to costly repairs if left untreated.
To correctly fill cracks in concrete, clean the crack thoroughly, choose the right filler (epoxy, polyurethane, or vinyl concrete patching compound2), apply the material according to manufacturer instructions, and allow proper curing time. For cracks wider than 1/4 inch, use a concrete patch mixed with sand.

After years in the construction industry, I've learned that fixing concrete cracks early saves money and extends the life of your concrete structures. Let's explore the best methods to repair different types of concrete cracks and get professional results.
How Do I Choose the Right Concrete Patching Material?
I've seen countless DIY repairs fail because people grabbed the wrong product at the hardware store. Using the wrong patching material is like trying to fix a leaky pipe with duct tape - it won't last.
Choose your concrete patching material based on crack width, location, and exposure conditions. Use epoxy for structural cracks (1/8" or less), polyurethane sealant for moving cracks, vinyl concrete patchers for surface cracks, and hydraulic cement for wet areas or basement cracks.

When I'm helping customers in developing countries like Saudi Arabia or UAE, I always stress the importance of climate considerations in material selection. Hot, dry climates require different solutions than humid environments.
Material Selection Criteria
The right patching material makes all the difference in concrete repair durability. I recommend considering these four key factors:
-
Crack Width: Hairline cracks (under 1/8") need liquid fillers that can penetrate deeply. Medium cracks (1/8"-1/4") work well with vinyl concrete patchers. Large cracks (over 1/4") require mortar mixes or specialized concrete repair products.
-
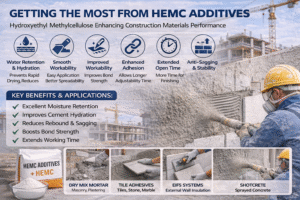
Movement Potential: Some cracks are dormant while others actively move with temperature changes or settlement. For cracks that might move, flexible materials like polyurethane are essential. Our hydroxypropyl methylcellulose (HPMC) products provide excellent flexibility and adhesion for these applications.
-
Exposure Conditions: Will the repair be exposed to UV, chemicals, or heavy traffic? Epoxies offer excellent chemical resistance but may yellow in sunlight. Polyurethanes provide better UV stability for outdoor repairs.
-
Aesthetic Requirements: For visible areas, consider color-matching options. Some products can be tinted or painted, while others maintain their appearance better over time.
| Patching Material | Best For | Advantages | Limitations |
|---|---|---|---|
| Epoxy | Structural cracks | High strength, chemical resistant | Limited flexibility |
| Polyurethane | Moving cracks | Flexible, waterproof | Less strength than epoxy |
| Vinyl Patch | Surface repairs | Easy to use, good adhesion | Not for structural repairs |
| Hydraulic Cement | Wet areas | Sets underwater, fast-setting | Rigid, may crack if movement occurs |
| HPMC-Modified Mortar | General repairs | Improved workability, adhesion | Requires proper mixing |
What Are the Different Types of Concrete Cracks I Should Know About?
When I first started working with concrete, I was overwhelmed by the variety of cracks I encountered. Each type signals a different problem and needs a specific repair approach.
The main types of concrete cracks are shrinkage cracks (from drying), settlement cracks (from unstable soil), structural cracks (from excessive loading), and crazing cracks (superficial surface patterns). Identifying the crack type is essential for choosing the correct repair method and preventing recurrence.

Through my experience with customers in countries like Brazil and Mexico, I've noticed that understanding the root cause of concrete cracking helps prevent future issues, especially in regions with extreme temperature variations or seismic activity.
Understanding Concrete Crack Patterns
When I analyze concrete cracks, I look beyond the surface to understand what's happening structurally. This knowledge guides my repair recommendations:
-
Shrinkage Cracks: These appear as random patterns during the concrete curing process. They're usually thin and shallow, forming within the first month after pouring. Our redispersible latex powder significantly reduces shrinkage cracking when added to concrete mixtures.
-
Settlement Cracks: These typically run vertically or diagonally and widen over time. They indicate foundation movement and may require professional evaluation before repair. Watch for cracks wider at the top or bottom, which suggest ongoing settlement issues.
-
Structural Cracks: These form due to improper design or excessive loading. They often appear as horizontal cracks in walls or wide cracks in load-bearing elements. These demand immediate attention as they compromise building integrity.
-
Temperature-Related Cracks: Expanding and contracting concrete creates these distinctive patterns. They're common in regions with extreme temperature swings like Saudi Arabia and UAE. Adding hydroxyethyl cellulose to concrete mixtures improves thermal crack resistance.
-
Crazing Cracks: These superficial, interconnected surface cracks resemble spider webs. While unsightly, they rarely indicate structural problems. They result from too-rapid surface drying and can be prevented with proper concrete finishing techniques.
| Crack Type | Visual Characteristics | Structural Concern | Recommended Repair |
|---|---|---|---|
| Shrinkage | Random pattern, thin | Low | Liquid crack filler |
| Settlement | Vertical/diagonal, wider at ends | Medium to High | Polyurethane injection, possible foundation repair |
| Structural | Horizontal (walls), often wide | High | Professional evaluation, epoxy injection |
| Temperature | Parallel lines, even spacing | Medium | Flexible sealant with HPMC |
| Crazing | Interconnected surface pattern | Low | Surface overlay with CMC additive |
What Are the Step-by-Step Instructions for Filling Concrete Cracks?
I've watched many people rush through concrete repairs only to have the cracks reappear months later. Skipping steps leads to wasted time and materials.
To fill concrete cracks properly: 1) Clean the crack thoroughly using a wire brush and vacuum; 2) Apply an appropriate concrete bonding agent3; 3) Press the patching material firmly into the crack; 4) Smooth the surface to match surrounding concrete; 5) Keep the repair damp for proper curing.

Over the years, I've refined my concrete repair technique through countless projects in diverse environments, from the humid conditions of the Philippines to the dry heat of the Middle East. I've found that proper preparation makes the biggest difference in repair longevity.
Detailed Repair Process
When I train our customers' technical teams, I emphasize these critical steps for durable concrete repairs:
-
Assessment and Preparation: Before starting any repair, evaluate the crack's cause, width, depth, and whether it's active or dormant. Use a chisel to create a "V" shape along the crack, widening the top to allow better material penetration and bonding. This step is crucial but often skipped by DIYers.
-
Thorough Cleaning: Remove all loose material, dust, and debris using a wire brush, followed by a shop vacuum. For oil-contaminated concrete (common in industrial settings), use a degreaser before proceeding. Any contamination will prevent proper adhesion.
-
Priming: Apply an appropriate bonding agent3 to enhance adhesion between the old concrete and new repair material. For deeper cracks, installing a foam backer rod before filling prevents the repair material from flowing too deeply and ensures proper depth-to-width ratio.
-
Material Preparation: Different products have specific mixing requirements. Our hydroxypropyl methylcellulose (HPMC) significantly improves the workability and water retention of cementitious repair materials. For custom formulations, I recommend:
- Small cracks: HPMC + fine cement mixture (2% HPMC by weight)
- Medium cracks: HPMC + cement with fine sand (1.5% HPMC)
- Large cracks: HPMC + cement mortar with aggregate (1% HPMC)
-
Application Techniques: Work the material firmly into the crack using a putty knife or trowel, pressing from multiple angles to eliminate air pockets. Build up in layers for deep cracks, allowing partial setting between applications to prevent shrinkage.
-
Finishing and Curing: Texture the surface to match surrounding concrete while still workable. For optimal strength development, cover the repair with plastic or apply a curing compound containing carboxymethyl cellulose (CMC) to retain moisture for at least 7 days. In hot climates like Saudi Arabia, this curing step is absolutely critical.
Conclusion
Fixing concrete cracks correctly saves money and prevents further damage. By choosing the right materials, understanding crack types, and following proper repair techniques, you'll achieve long-lasting results that protect your concrete investments.
-
Understanding the causes of cracked concrete can help you prevent future issues and choose the right repair methods. ↩
-
Find out how vinyl concrete patching compound can be a quick and effective solution for surface repairs. ↩
-
Understand the role of bonding agents in enhancing adhesion for concrete repairs. ↩ ↩