Are you confused about whether to use tile adhesive or mortar for your tiling project? This common dilemma can lead to costly mistakes and potential tile failures if you make the wrong choice.
You can use tile adhesive1 instead of mortar2 in many indoor applications, especially for wall tiles and smaller floor tiles in dry areas. Tile adhesive offers easier application and faster setting time, while traditional mortar provides better strength for heavy tiles and wet areas like bathrooms and outdoors.

When I started working with tile installation solutions, I quickly learned that choosing between tile adhesive1 and mortar2 isn't just about personal preference. Each product has specific properties that make it suitable for particular applications. Let me share what I've learned from helping countless customers select the right product for their tiling projects.
Mortar Vs Tile Adhesive - Can I Use Tile Adhesive Instead Of Mortar To Lay Ties?
Facing a tiling project but unsure which adhesive to choose? The wrong choice between mortar and tile adhesive could lead to cracked tiles, water damage, or complete installation failure.
Tile adhesive (premixed mastic) works best for wall tiles in dry areas, offering easy application and quick grab. Mortar (thinset) is better for floors, wet areas, and outdoor applications due to its superior strength and water resistance. For bathroom floors and shower walls, always choose mortar for long-term durability.

The distinction between these two products often causes confusion among both DIY enthusiasts and professional contractors. In my years working with construction materials, I've found that understanding the core differences can save significant time and money.
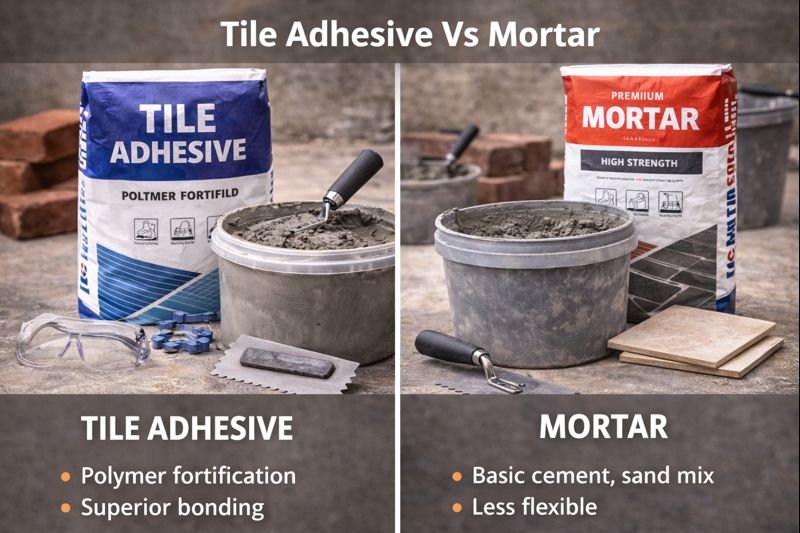
Mortar, also called thinset, is a cement-based product that requires mixing with water before application. It contains Portland cement, fine sand, and cellulose additives like HPMC3 (Hydroxypropyl Methylcellulose) that improve water retention and workability. This composition gives mortar excellent bonding strength and water resistance, making it ideal for high-moisture environments.
On the other hand, tile adhesive (sometimes called mastic) comes pre-mixed and ready to use. It's typically made with acrylic or latex polymers that provide immediate grab but don't offer the same long-term strength as mortar. While convenient, its limitations become apparent in certain applications.
| Feature | Tile Adhesive | Mortar |
|---|---|---|
| Composition | Acrylic/latex polymers | Portland cement with HPMC additives |
| Water Resistance | Limited | Excellent |
| Application | Ready to use | Requires mixing |
| Setting Time | Faster (24-48 hrs) | Slower (72+ hrs) |
| Best For | Dry area wall tiles | Floors, wet areas, outdoors |
| Cost | Higher | Lower |
Best Tools For Installing Tile Adhesive
Preparing to install tiles but worried about having the right tools? Using improper tools not only makes the job harder but can result in uneven tile placement and adhesive wastage.
Essential tools for tile adhesive installation include a notched trowel (1/4" to 1/2" depending on tile size), margin trowel for transferring adhesive, rubber mallet for setting tiles, tile spacers for consistent gaps, and a level to ensure proper alignment. For large projects, consider a tile cutter or wet saw.

Having the right tools has made all the difference in my tiling projects. From my experience, the quality of your tools directly impacts the final result of your installation. The notched trowel deserves special attention as it's responsible for creating the right adhesive bed thickness.
The size of the notches on your trowel should match your tile size. For small tiles (under 4 inches), a 1/4" notched trowel works best. Medium tiles (4-8 inches) require a 1/4" x 3/8" notched trowel. Large format tiles (over 8 inches) need a 1/2" notched trowel to ensure proper coverage.
Beyond the basics, several specialty tools can make your tiling job easier and more professional. A tile nipper helps make curved cuts around fixtures. Rubber tile leveling spacers not only create even gaps but also help prevent lippage—where one tile edge sits higher than its neighbor. For mixing mortar (if you choose to use it), a drill with a mixing paddle attachment ensures a smooth, consistent mix without air bubbles that could weaken your installation.
For cleaning, keep microfiber cloths and a bucket of clean water nearby to wipe excess adhesive before it dries. A grout float, though used later in the process, is also essential to have on hand for completing your project. Remember that quality tools might cost more initially but will save you time, frustration, and potentially the cost of redoing a failed installation.
How to Apply Tile Adhesive
Starting a tiling project but feeling overwhelmed by the application process? Incorrect application techniques can lead to hollow-sounding tiles, uneven surfaces, and premature tile failure.
To apply tile adhesive correctly, ensure the surface is clean, dry, and primed if necessary. Spread adhesive with the flat side of a notched trowel first, then create ridges with the notched edge. Work in small sections of 3-4 square feet. Press tiles with a slight twisting motion and check for 80-95% coverage on the tile back.

From my extensive work with various construction adhesives, I've found that proper preparation is just as important as the application itself. Surface preparation can make or break your tile installation. For concrete surfaces, fill any cracks or holes with a patching compound and allow it to cure completely. For drywall, ensure it's securely fastened and free from dust. Wooden substrates may require a backer board installation before tiling to prevent warping.
Temperature and humidity significantly affect adhesive performance. I always recommend working in conditions between 50°F and 90°F (10°C-32°C) with moderate humidity. Extreme conditions can cause the adhesive to dry too quickly or too slowly, compromising bond strength. If your area is particularly hot or dry, dampen the substrate slightly before application to improve adhesion and working time.
The "back-buttering" technique is crucial for larger tiles (12"×12" and above). This involves applying a thin layer of adhesive to the back of the tile in addition to the substrate. This technique ensures better coverage and stronger bonds, especially important for floor applications where tiles receive constant stress.
Application Steps in Detail:
- Mix or open your adhesive (ensure consistent texture)
- Apply to substrate with flat trowel side first
- Create ridges with notched edge at 45° angle
- Set tile with slight twisting motion
- Check coverage by occasionally removing a tile
- Clean excess adhesive from grout lines immediately
Proper curing time varies by product but generally allows light foot traffic after 24 hours and full curing within 7 days. Rushing this process by grouting too soon or placing heavy items on newly installed tiles can compromise the entire installation.
Can I use tile adhesive1 instead of thinset4?
Wondering if you can save time using premixed tile adhesive instead of thinset? This substitution could be disastrous in certain applications, leading to tiles that pop off or become damaged by moisture.
You can use tile adhesive instead of thinset (mortar) for wall tiles in dry areas and small floor tiles in low-traffic areas. However, for shower walls, bathroom floors, outdoor applications, or large format tiles, thinset mortar is essential due to its superior water resistance and structural strength.

Through my years of product development work, I've seen many installation failures resulting from using the wrong adhesive type. The chemistry behind these products explains their different performance characteristics. Thinset mortar creates a chemical bond through a hydration process that forms crystalline structures, giving it exceptional strength and durability. Tile adhesive relies on the evaporation of water for polymer particles to fuse together, which works well for lighter applications but lacks the same robust structure.
Temperature fluctuations affect these products differently as well. Thinset mortar has excellent thermal stability, maintaining its bond through heating and cooling cycles. This makes it particularly valuable for installations near heat sources like fireplaces or in areas with significant temperature changes. Tile adhesive has more limited thermal resistance and may fail prematurely when subjected to temperature extremes.
Cost considerations also play a role in this decision. While premixed tile adhesive costs more per square foot, it might save money on smaller projects where purchasing separate mixing tools and materials for thinset wouldn't be economical. For larger projects, thinset mortar offers significant cost savings despite requiring more preparation time.
| Application | Recommended Product | Reason |
|---|---|---|
| Kitchen backsplash | Tile Adhesive | Dry area, vertical application |
| Shower walls | Thinset | Water exposure, safety critical |
| Bathroom floor | Thinset | Water exposure, high traffic |
| Living room floor | Thinset | Weight-bearing, high traffic |
| Outdoor patio | Thinset | Weather exposure, temperature changes |
Are mortar and tile adhesive the same thing?
Confused by product labels that seem to use "mortar" and "tile adhesive" interchangeably? This misunderstanding could lead you to purchase the wrong product for your specific tiling needs.
No, mortar and tile adhesive are not the same thing. Mortar (thinset) is a cement-based powder that must be mixed with water, offering superior strength and water resistance. Tile adhesive is a premixed organic mastic that provides convenience and quick grab but has limitations in wet areas and with heavy tiles.

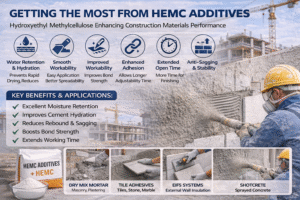
In my work formulating construction materials, I've studied the chemical compositions of both products extensively. Traditional mortar contains Portland cement, sand, and important additives like HPMC (Hydroxypropyl Methylcellulose) which we manufacture specifically for construction applications. HPMC improves water retention, workability, and adhesion strength, making the mortar more suitable for a wider range of conditions.
The chemical composition creates significant performance differences. Mortar cures through a hydration process, creating strong crystalline bonds that resist water penetration. This makes it ideal for wet areas like showers and bathrooms. It also accommodates slight substrate movement without cracking. Tile adhesive cures through water evaporation and polymer formation, creating a bond that's more vulnerable to moisture and movement.
Weight capacity presents another important distinction. Mortar can support heavy natural stone and large format porcelain tiles without sagging or failing. Most tile adhesives have weight limitations that make them unsuitable for floor applications with heavy tiles or high-traffic areas. For commercial applications, mortar is almost always the required choice due to these strength characteristics.
Manufacturing standards also differ between these products. Mortars typically conform to ANSI A118.1 (unmodified) or ANSI A118.4 (modified with polymers for increased flexibility) standards. Tile adhesives generally follow different guidelines with lower strength requirements. Professional installers and contractors typically prefer mortar for its reliability and warranty protection, while DIYers often gravitate toward tile adhesive for its convenience.
What can you use instead of mortar for tile?
Looking for alternatives to traditional mortar but worried about compromising your tile installation? Using inappropriate substitutes can lead to expensive repairs when tiles crack or detach prematurely.
Besides traditional mortar, viable alternatives include premixed tile adhesive (for dry wall areas), epoxy mortar (for chemical resistance), acrylic mortar additives (for flexibility), and self-leveling underlayment (for uneven floors). For temporary installations, double-sided mounting tape or peel-and-stick tiles offer mortar-free solutions.

Throughout my career working with building materials, I've evaluated numerous adhesive technologies across different applications. Epoxy mortar stands out as a premium alternative to traditional cement-based mortar, offering exceptional chemical and stain resistance. Though significantly more expensive, it's invaluable in demanding environments like commercial kitchens, laboratories, and swimming pools where exposure to chemicals, acids, and oils is common.
For those concerned about substrate movement, modified thinset with acrylic additives provides enhanced flexibility. These polymer modifications improve adhesion and reduce cracking in areas where slight structural movement might occur, such as wood subfloors that expand and contract with humidity changes. Many professionals mix standard mortar with acrylic additives like Kehao's special-purpose additives to achieve custom performance characteristics for specific installation challenges.
For more temporary or rental-friendly installations, newer peel-and-stick technologies have evolved significantly in recent years. Modern products offer surprisingly good durability for low-traffic areas, though they still can't match the performance of properly installed mortar systems. These solutions typically use pressure-sensitive adhesives similar to those in high-performance tapes but formulated specifically for tile applications.
| Alternative | Best For | Limitations |
|---|---|---|
| Premixed Adhesive | Dry area walls, backsplashes | Not for wet areas or floors |
| Epoxy Mortar | Chemical exposure areas, commercial kitchens | Expensive, difficult application |
| Acrylic-Modified Mortar | Areas with substrate movement | Higher cost than standard mortar |
| Self-Leveling Compound | Uneven subfloors | Requires mortar on top for tile installation |
| Peel-and-Stick Systems | Temporary installations, rentals | Limited durability, size options |
For uneven floors, self-leveling underlayment creates a flat, smooth surface before tiling. While not a direct mortar replacement, it's often an essential step before applying proper mortar, especially in older homes with significant floor irregularities.
Conclusion
Choosing between tile adhesive and mortar depends on your specific project requirements. For dry wall applications and small tiles, adhesive offers convenience. For floors, wet areas, and outdoors, mortar provides the necessary strength and durability. Always prioritize the right product for long-lasting results.
-
Explore the properties and applications of tile adhesive to understand its benefits for your tiling projects. ↩ ↩ ↩
-
Learn about mortar's composition and advantages, especially for wet and heavy tile applications. ↩ ↩
-
Understand the role of HPMC in improving mortar's water retention and bonding strength. ↩
-
Understand the application process and benefits of thinset for durable tile installations. ↩