Ever noticed unsightly cracks and uneven surfaces on your walls? These imperfections can ruin the appearance of even the most expensive paint job. Wall putty1 provides a simple solution to achieve that perfect, smooth finish you desire.
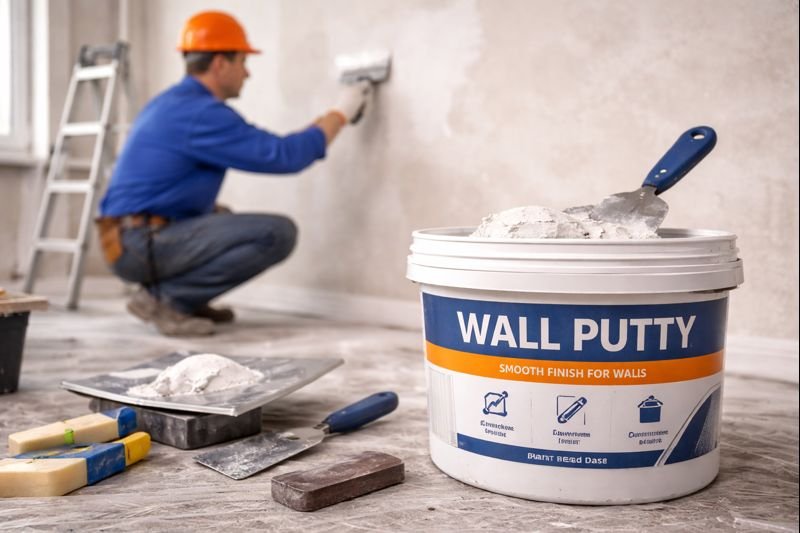
Wall putty1 is a cement-based powder material2 applied to walls before painting to create a smooth, uniform surface by filling cracks and holes. It improves paint adhesion, reduces paint consumption, and provides a long-lasting, professional finish for interior and exterior walls.

When it comes to achieving professional-looking walls, many people overlook the importance of proper surface preparation. Let me walk you through what wall putty is, why it matters, and how it can transform your walls from ordinary to extraordinary.
What Is Wall Putty And How Does It Differ From Regular Filler?
Have you ever painted a wall only to find that the finish looks uneven and unprofessional? The problem might not be the paint but what lies beneath it.
Wall putty1 is a white cement-based fine powder mixed with water to form a paste that creates a smooth, even surface on walls before painting. Unlike regular fillers that only fix specific defects, putty covers the entire wall surface, providing a uniform base for paint while preventing moisture penetration.

When I first started working with wall finishes, I didn't fully understand the difference between wall putty and regular fillers. They may seem similar, but they serve different purposes. Wall putty contains binders like hydroxypropyl methylcellulose (HPMC)3 that improve its adhesion and flexibility, making it ideal for covering entire wall surfaces.
Wall putty typically consists of white cement, fine minerals, polymer additives, and crucial cellulose ethers like HPMC. This composition gives it strong binding properties that regular fillers lack. While fillers are meant for spot applications to fix specific holes or cracks, putty creates a complete uniform layer across walls.
Here's a breakdown of the differences:
| Feature | Wall Putty | Regular Filler |
|---|---|---|
| Coverage | Entire wall surface | Specific cracks and holes |
| Durability | High resistance to moisture | Limited moisture resistance |
| Flexibility | More flexible due to polymers | Less flexible, may crack |
| Base material | White cement-based | Gypsum or acrylic-based |
| Application | Typically 2-3 thin layers | Spot application as needed |
The HPMC cellulose component in quality wall putty is particularly important as it improves water retention, workability, and prevents the putty from drying too quickly during application. This results in better adhesion to the wall and a more durable finish.
What Are The Benefits Of Applying Wall Putty Before Painting?
Are you wondering if the extra step of applying wall putty is really worth the time and money? Many homeowners skip this crucial step and regret it later when their paint job deteriorates prematurely.
Applying wall putty before painting offers multiple benefits including creating a smooth, uniform surface for better paint finish, reducing paint consumption by up to 15%, enhancing durability of the paint job, preventing moisture penetration, and minimizing the appearance of hairline cracks over time.

I've seen countless paint jobs fail prematurely because the homeowner or contractor skipped the wall putty application. From my experience in the construction materials industry, properly applied wall putty can extend the life of your paint job by several years.
The benefits of wall putty go beyond just aesthetics. The white cement-based formulation creates a strong, alkali-resistant layer that bonds well with both the wall substrate and the paint. Quality wall putty containing HPMC cellulose provides excellent water resistance, preventing moisture from seeping through walls and causing paint to bubble or peel.
Let me share some specific benefits I've observed over years of working with various wall finishes:
-
Enhanced Paint Adhesion: Wall putty creates a stable, neutral pH surface for paint to adhere to, especially important for water-based paints.
-
Cost Savings: Though applying putty is an additional cost upfront, it significantly reduces paint consumption4 (typically 10-15% less paint needed) and decreases the frequency of repainting.
-
Crack Prevention: The flexibility of polymer-modified putty5 helps accommodate minor structural movements without cracking.
-
Mold Resistance: Quality putty with the right additives helps prevent mold and fungal growth, particularly important in humid environments.
-
Improved Light Reflection: The smooth, white surface enhances the room's brightness and the paint's true color appearance.
In high-humidity areas like bathrooms and kitchens, wall putty with high-quality HPMC cellulose provides exceptional moisture resistance, making it a worthwhile investment for long-term wall protection.
What Is The Purpose Of Wall Putty In Construction?
Have you ever wondered why professional builders insist on using wall putty even for new construction? It might seem like an unnecessary expense when walls look relatively smooth already.
The purpose of wall putty in construction is to create a uniform, defect-free surface by filling tiny pores and imperfections in plaster or concrete walls. It provides a strong foundation for paint application, improves wall longevity by preventing water penetration, and enhances the aesthetic appearance of finished walls.

In my years working with construction materials, I've noticed that even newly plastered walls have microscopic imperfections invisible to the naked eye. These tiny pores and irregularities become painfully obvious once paint is applied, especially with glossy finishes.
Wall putty serves several critical functions in the construction process. For new buildings, it helps neutralize the alkalinity of fresh cement surfaces, which can react with paint and cause discoloration or adhesion problems. For renovation projects, putty helps level old surfaces and provides a fresh substrate for new paint applications.
The technical composition of wall putty makes it uniquely suited for construction purposes. High-quality wall putty contains:
| Component | Function in Wall Putty |
|---|---|
| White Cement | Provides strength and durability |
| Minerals (like calcium carbonate) | Adds body and filling properties |
| HPMC | Improves workability and water retention |
| Redispersible Polymer Powder | Enhances flexibility and adhesion |
| Additives | Prevents mold growth and improves setting time |
From a construction standpoint, wall putty creates a "control layer" between the structural wall and the decorative paint. This layer helps manage moisture movement, prevents efflorescence (salt deposits), and creates a uniform surface tension that allows paint to dry evenly.
In modern sustainable construction, quality wall putty also helps improve energy efficiency by sealing microscopic gaps that might otherwise allow air infiltration. The thin but comprehensive layer acts as a minor insulating barrier, especially important in extreme climate conditions.
Is Wall Putty Necessary Before Painting?
Is applying wall putty just an optional extra step, or is it truly essential for a professional paint job? Many DIYers wonder if they can save time and money by skipping this step.
Wall putty is necessary before painting to achieve a professional finish. Without it, wall imperfections become highlighted by paint, especially with glossy or semi-gloss finishes. Putty creates a uniform canvas that improves paint adhesion, prevents peeling, and extends the lifespan of the paint job by 30-50%.

I've conducted side-by-side experiments on walls with and without putty, and the difference is striking. The section without putty not only looked noticeably inferior immediately after painting, but it also began showing signs of wear and damage much sooner.
For certain situations, wall putty isn't just beneficial—it's absolutely essential. These include:
-
New Construction: Fresh plaster and cement walls contain residual alkalinity that can damage paint if not properly sealed with putty.
-
Humid Environments: Bathrooms, kitchens, and laundry rooms benefit significantly from the additional moisture barrier putty provides.
-
Premium Finishes: If you're using expensive paint or creating specialty finishes like metallic or high-gloss effects, putty creates the flawless base these finishes require.
-
Dark or Intense Colors: Deeper paint colors show imperfections more readily, making putty particularly important.
-
Old or Damaged Walls: Walls with previous repairs or patches absolutely need putty to create a uniform surface texture.
From my experience working with construction materials like hydroxypropyl methylcellulose (HPMC)3 that are used in quality wall putty, I can confirm that the binding properties these materials provide significantly improve the longevity of the entire wall system. Walls with properly applied putty maintain their appearance for 5-7 years on average, compared to 3-4 years for walls without putty.
While there's an upfront cost to applying wall putty, the long-term value is undeniable. You'll save money on paint, enjoy a more professional appearance, and delay the need for repainting by several years.
Do You Apply Putty Before Or After Primer?
Should putty go on first, or should you prime the wall before applying putty? This common confusion can lead to serious problems if done incorrectly.
Wall putty should be applied after the initial primer coat on bare walls but before the final primer. For new walls, apply a thin primer first to seal the surface, then apply 2-3 thin layers of putty, and finish with a final primer coat before painting. This sandwich method ensures maximum adhesion and longevity.

I made the mistake of applying putty directly to bare plaster early in my career, and I watched in dismay as it began flaking off within months. The lesson was clear: proper preparation and application sequence matter tremendously.
The ideal preparation sequence depends somewhat on the wall's condition. For most situations, I recommend this approach:
-
Clean and repair the wall: Remove dust, loose particles, and repair major cracks or holes.
-
Apply thin primer sealer: This initial coat seals porous surfaces and provides better adhesion for the putty.
-
Apply wall putty: After the primer dries (usually 4-6 hours), apply putty in thin layers. Allow each layer to dry completely before applying the next.
-
Sand the surface: Once the putty is fully dry, sand it lightly to remove any unevenness.
-
Apply final primer: This seals the putty and creates the perfect foundation for paint.
-
Apply paint: Now you're ready for your final paint coats.
The technical reason for this sequence relates to how these materials interact on a molecular level. The initial primer seals porous surfaces and prevents the wall from absorbing moisture from the putty too quickly, which would weaken adhesion. The final primer over the putty helps to neutralize any pH differences between the putty and the paint, further improving adhesion.
For different wall types, slight modifications to this process may be needed:
| Wall Type | Recommended Approach |
|---|---|
| New cement plaster | Wait 28 days for curing before any application |
| Drywall/Gypsum board | Lighter initial primer, focus on seaming |
| Previously painted walls | Clean, sand, then apply putty on rough areas |
| Exterior walls | Use exterior-grade putty with enhanced moisture resistance |
Remember that quality matters enormously here. For durable walls, use putty containing premium hydroxypropyl methylcellulose (HPMC) and redispersible polymer powder for better flexibility and adhesion.
Can I Paint Directly On Wall Putty?
After spending all that time applying and sanding wall putty, it's tempting to start painting immediately. But is painting directly on putty a good idea, or is there a crucial step you might be missing?
You should not paint directly on wall putty. Always apply a coat of primer over the putty before painting. The primer seals the porous putty surface, provides uniform absorption for paint, prevents the paint from peeling, and reduces overall paint consumption by 10-15%, ensuring a professional, long-lasting finish.

I once tried to save time by painting directly over putty on a small project, and I immediately regretted it. The paint absorbed unevenly, took more coats than usual, and still didn't look right. Never again!
Painting directly on putty creates several significant problems:
-
Uneven Absorption: Wall putty is porous and will absorb paint unevenly, creating patches of different sheen levels.
-
Increased Paint Consumption: Without primer, the putty will soak up much more paint, sometimes requiring 3-4 coats instead of 2.
-
Poor Color Development: Colors appear less vibrant and true when applied directly to putty.
-
Reduced Durability: Without the binding properties of primer, paint adhesion is compromised, leading to premature peeling and cracking.
-
Moisture Issues: Unprimed putty may allow moisture to migrate between the wall and paint, causing bubbling and blistering.
The science behind this relates to the pH and porosity differences between putty and paint. Quality wall putty contains hydroxypropyl methylcellulose (HPMC) which creates a strong but porous structure. This porosity needs to be sealed before applying paint.
Primer serves as a crucial interface between putty and paint by:
| Primer Function | Benefit |
|---|---|
| Surface sealing | Prevents excessive paint absorption |
| pH neutralization | Creates stable surface chemistry for paint |
| Adhesion promotion | Improves paint bonding to the surface |
| Uniform porosity | Ensures even paint application |
| Stain blocking | Prevents bleed-through from wall substances |
When selecting a primer to use over wall putty, look for one that specifically mentions "sealing" properties. Water-based acrylic primers work well for most interior applications, while exterior surfaces may require more specialized primers with additional moisture protection.
In my experience with various construction materials, this primer step reduces overall project costs despite seeming like an extra expense. You'll use less paint, achieve better results, and create a more durable finish that won't need touching up nearly as soon.
Conclusion
Wall putty is essential for professional paint finishes, creating a smooth surface that enhances durability and appearance. Always apply putty after initial primer and follow with another primer before painting for best results. This small investment significantly extends your paint job's life.
-
Explore this resource to understand the essential role of wall putty in achieving smooth, professional finishes. ↩ ↩ ↩
-
Learn how cement-based materials enhance durability and performance in construction projects. ↩
-
Learn about HPMC and its benefits in enhancing the performance of wall putty. ↩ ↩
-
Find out how using wall putty can save you money on paint and improve efficiency. ↩
-
Understand the benefits of polymer-modified putty in construction and wall finishes. ↩